navigation
rebuilding & restoring N3876K - part 1
by Steve and Barb Wilson
We acquired N3876K in November of 1997. Stan Price, who flies for Southwest, heard about this Swift owned by another Southwest pilot, Alan Andersen, based at Naper-Aero in Naperville, IL. He had three Swifts in various stages of disassembly in his hangar. We bought the one that was really just a pile of parts. N3876K had suffered a hard landing in 1965 and was never rebuilt. The right side of the forward fuselage was poorly repaired which may have been why it never flew again. The main spar web in the center section was also damaged. The replacement center section received (with a good spar) had a hole in the right leading edge and the left leading edge was missing. Most of the parts were included except NOTHING firewall forward.
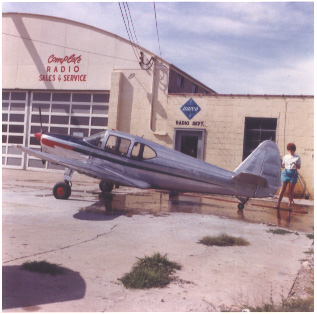
There were 9 other owners between 1965 and 1997, but no restoration occurred. The airplane was completely disassembled when we took possession. At the time we were based at DuPage Airport (DPA) in West Chicago, IL, which was just a 30-minute drive from Naper-Aero. That same month, we visited friends in Granbury, TX and bought a lot in the airpark at Pecan Plantation (0TX1) to retire to when Barb retired in 2000. The Swift project went into our DuPage hangar, but again, no real progress was made.
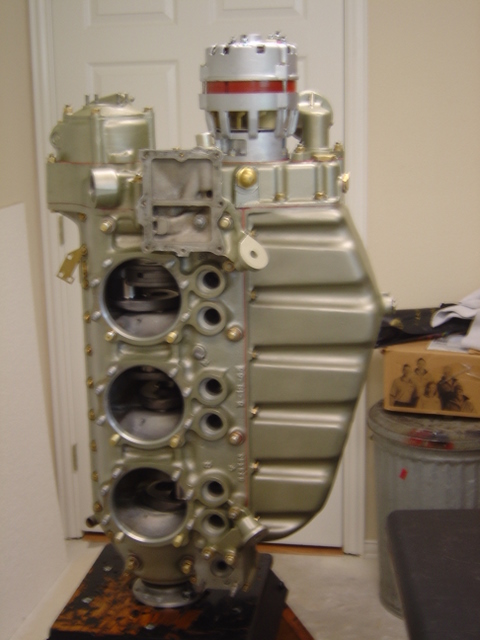
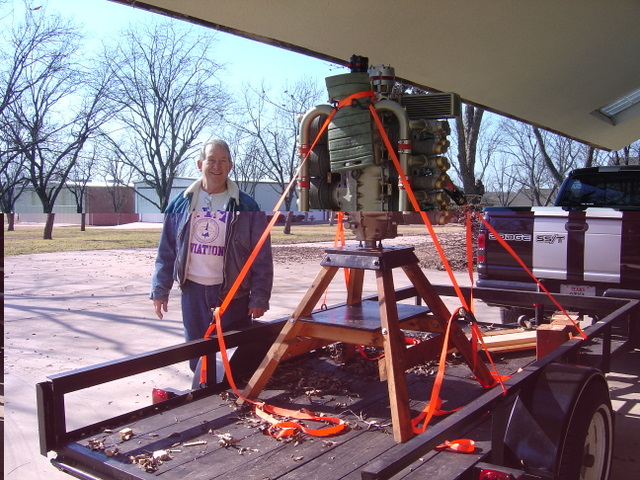
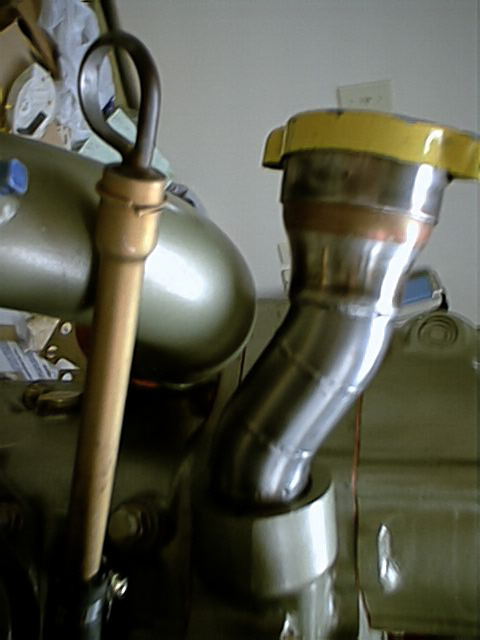
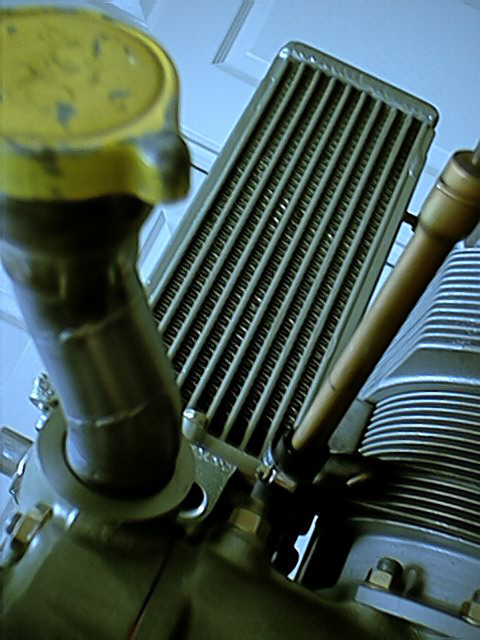
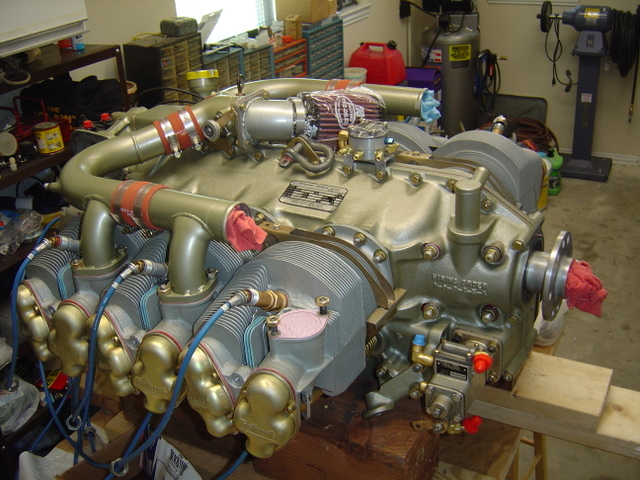
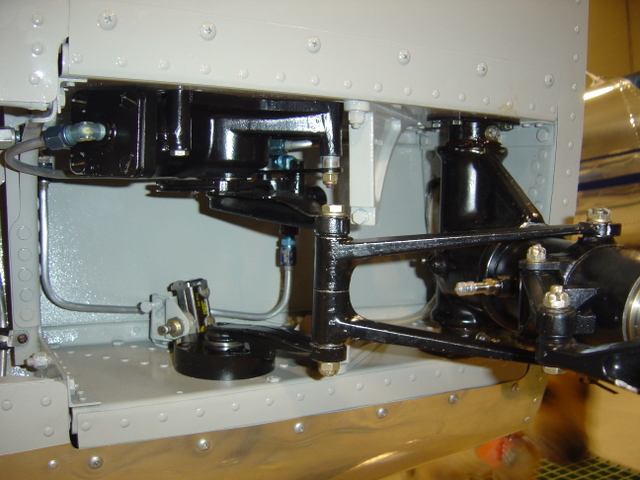
Before we moved Steve put on a Scott tail wheel and that made it easier to move around. Noticeable progress the first few years after the move to TX was VERY slow. We bought a Tri-Pacer to get son Ben his "private" and Barb recurrent and active with the local 99s chapter. During the summer of 2003, there was sporadic work getting it all cleaned up. It is amazing how much crud can build up in an idle airplane in nearly 40 years. In the fall and winter of 2004/5 we built up a Continental IO-360-D from a collection of parts in which only the case and sump was a matched set. Six good cylinders were sent off to Sentry in Ft Worth, for overhaul and they had ECI do the nickel plating. Our neighbor did a fantastic job of welding to customize the oil fill spout to fit around the reversed intake system. The accessory case, with large oil pump gears may have come off a Piper Seneca. The 90-degree (to the right) oil filter adapter was probably from a Piper Turbo Aero.
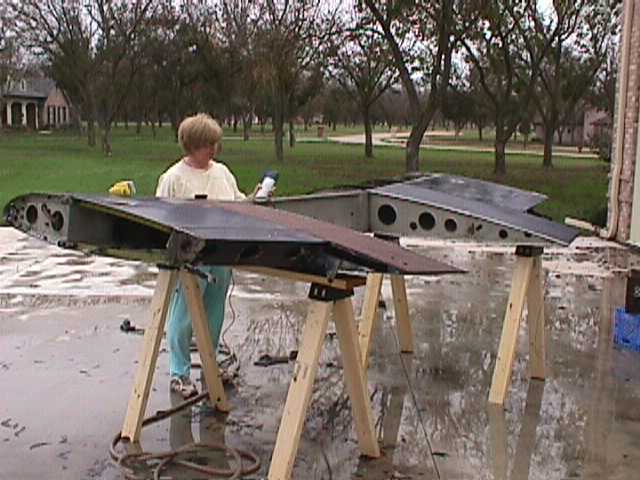
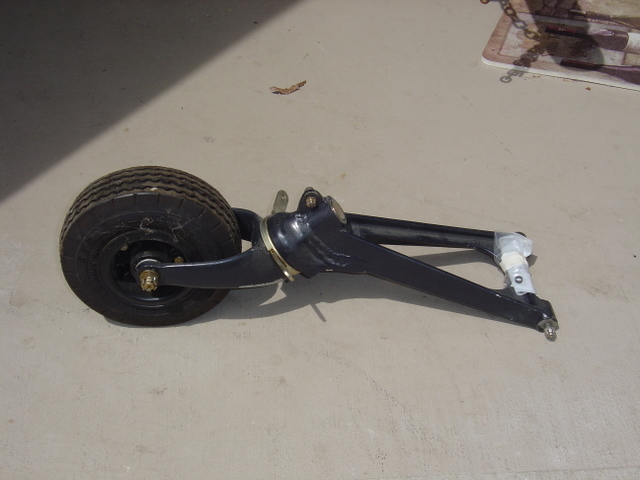
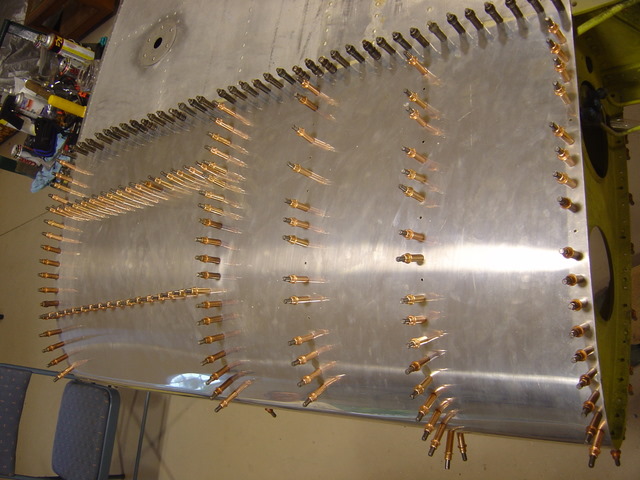
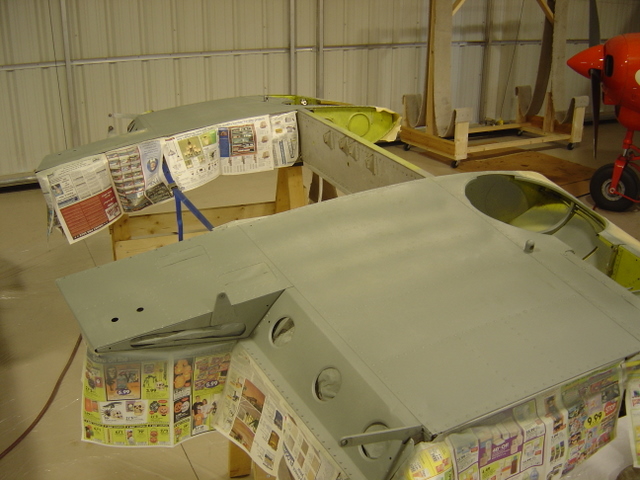
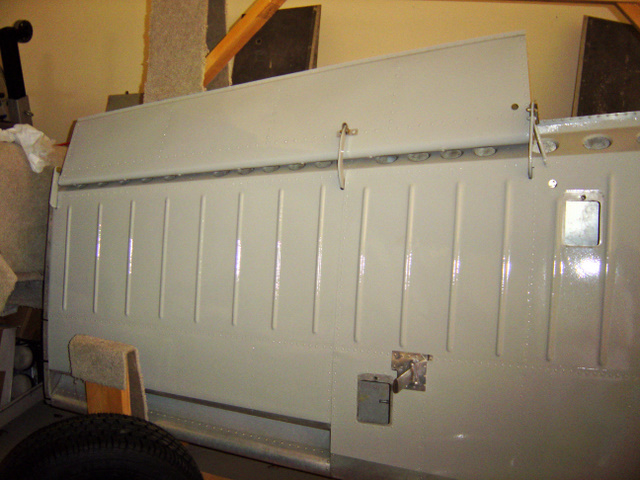
Once the work began in earnest on the airframe in the fall of 2005, we started on the center section and removed all the old paint. Then we replaced the two leading edge skins and repaired some other minor damage, installed tanks, hydraulic lines, inspected and cleaned the micro switches, replaced all the wiring, rebuilt the gear actuators, rebuilt the gear including new struts, bushings, seals, and springs. We installed Cleveland wheels and brakes. Then we installed Paul Chesley's stall strips. Next we painted the underside of the center section and the bottom of the wings. This stage was completed in early April 2006. The wings were in excellent condition with the exception of the missing pitot tube, and required alteration for a 1970# gross weight. The pitot was replaced with a heated blade style pitot.
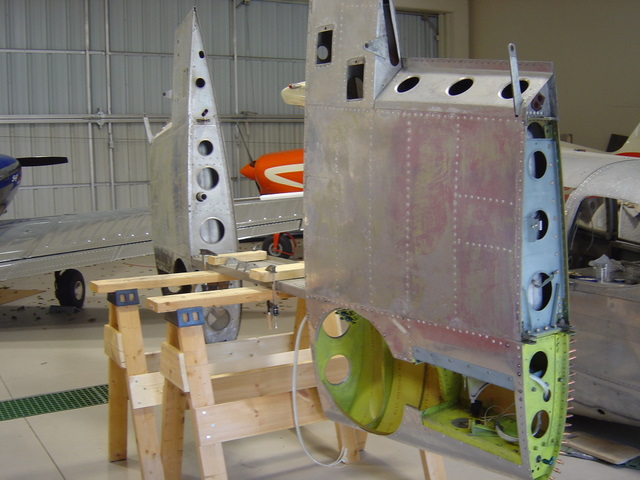
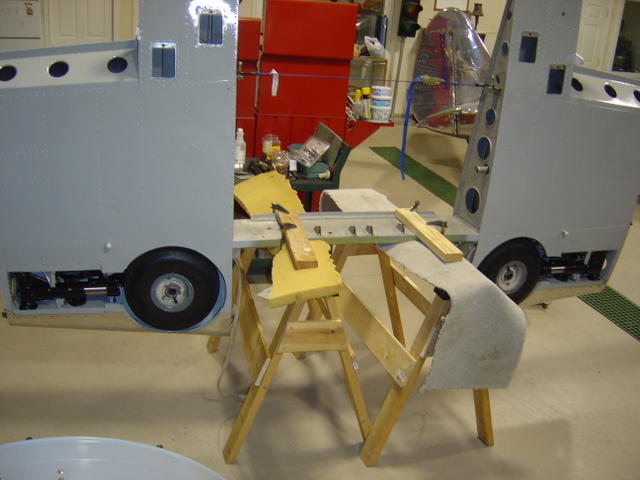
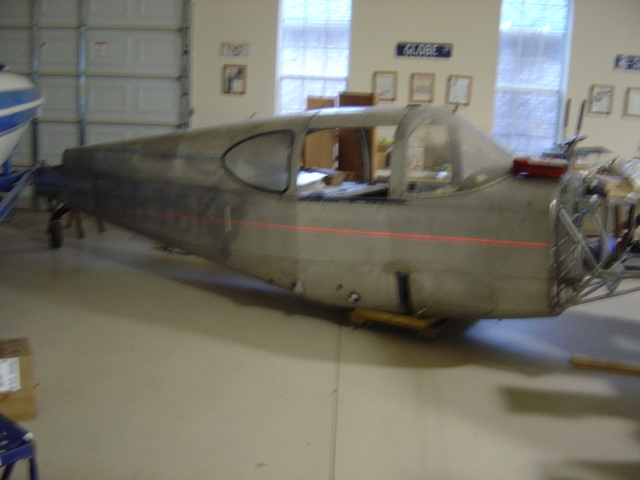
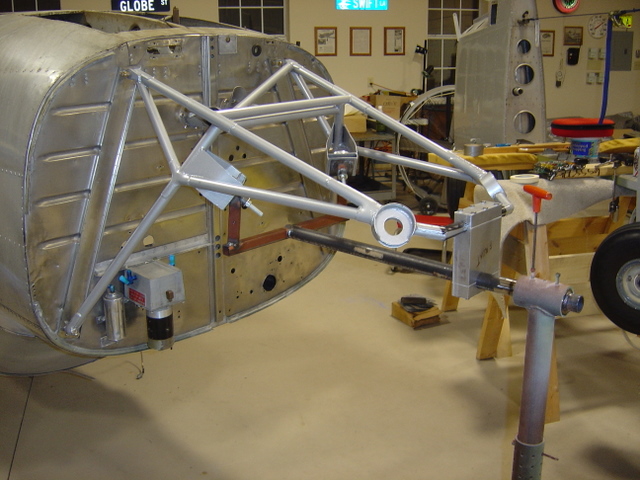
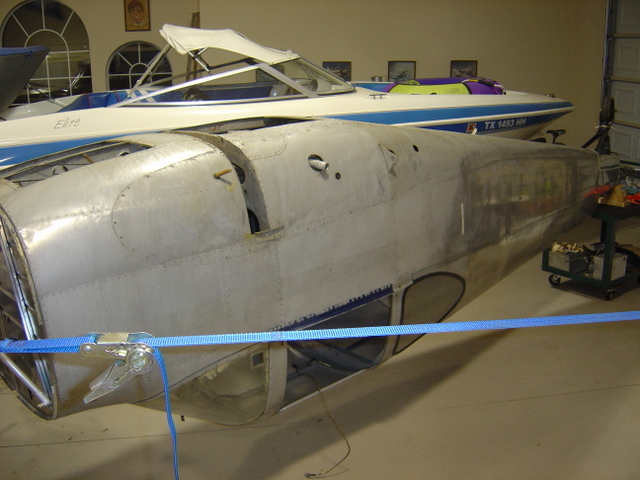
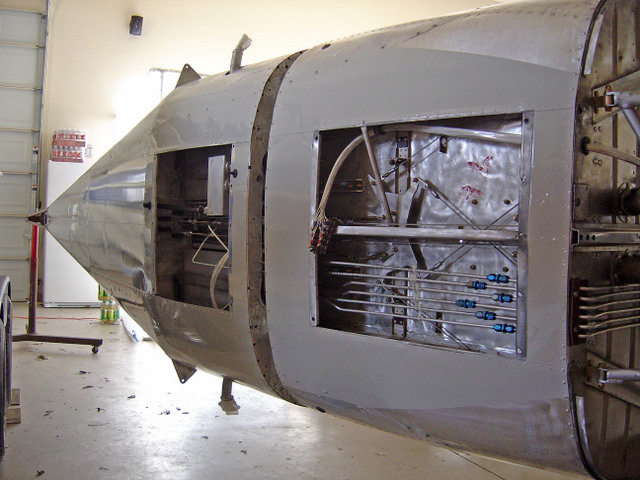
Now on to the fuselage! First we cleaned up the firewall and attached the engine mount. In May, Steve wanted to get the fuselage mounted on the center section, but after some further inspection, additional damage was discovered making it impractical to mate the two sections at that time. Thanks to the help of a talented neighbor with experience, we built a rotisserie that utilizes fixtures attached to the engine mount, and tailwheel mounting, which allowed us to comfortably work on the fuselage.
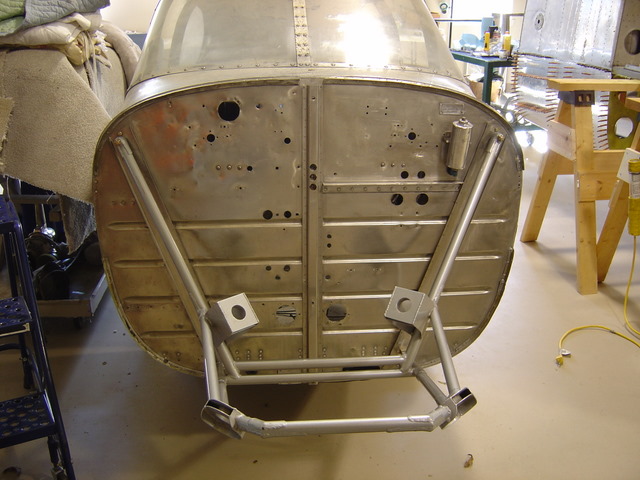
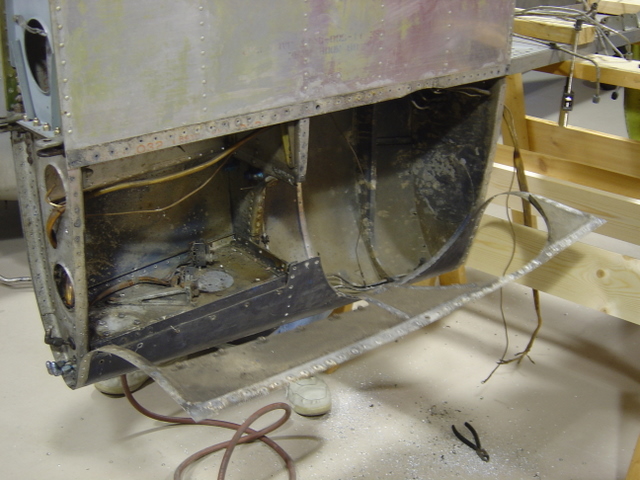
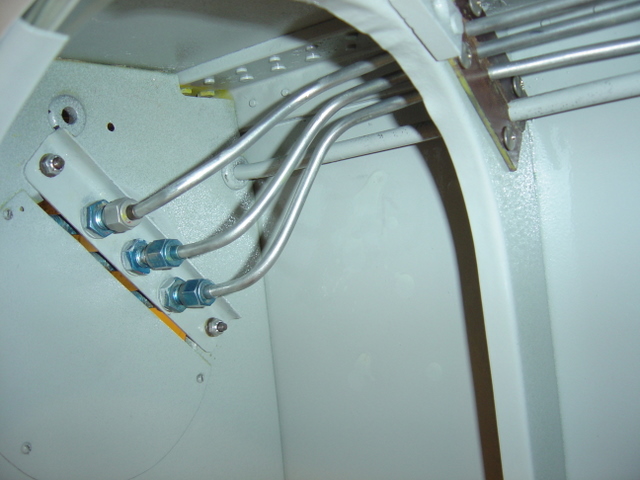
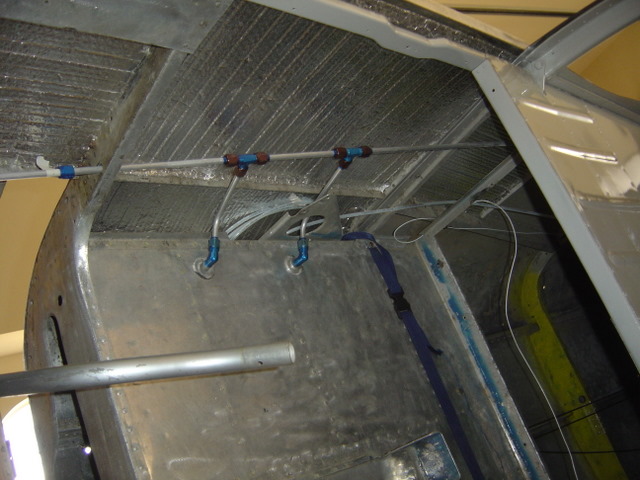
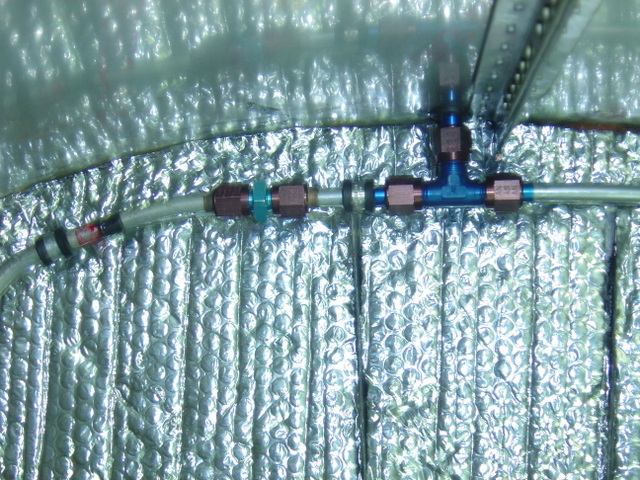
We started by repairing the previous poorly repaired damage inside the rear belly access panel. We removed the sump to install the Corbin belly tanks and found the sump through pipe was bent (probably from an accident). Someone had purposely plugged the sump drain with a 1/8" pipe plug that was safetied. We discovered a loose gascolator bracket, which had never been riveted to the support. The pilot hole in the bracket would lead one to believe that this had been missed at the factory. Anyone who has installed Corbin belly tanks lying on their back would quickly realize that the rotisserie was a godsend. We were able to install the entire system in a couple hours. We rebuilt the flap actuator, inspected and cleaned the micro switches and replaced all the wiring. When reinstalling the gascolator we re-plumbed it so that the gascolator can be it serviced without draining the tanks (another factory boo-boo on ALL Swifts).
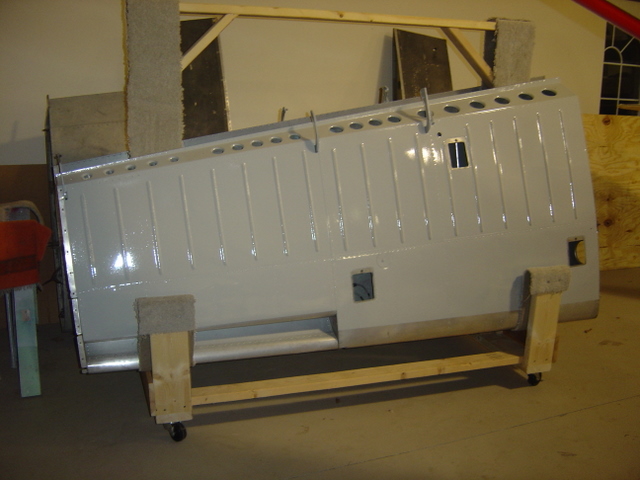
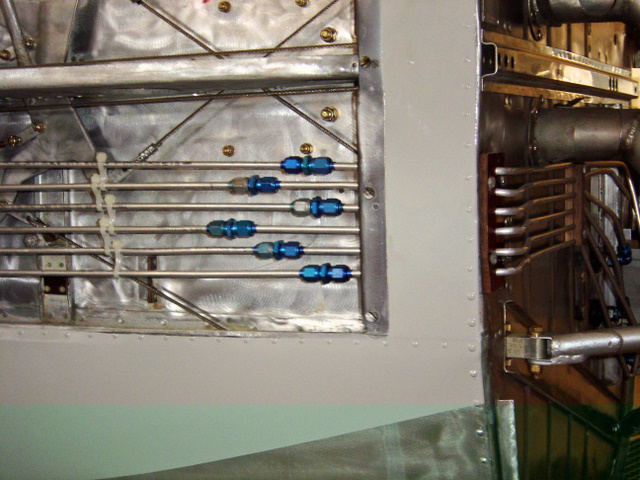
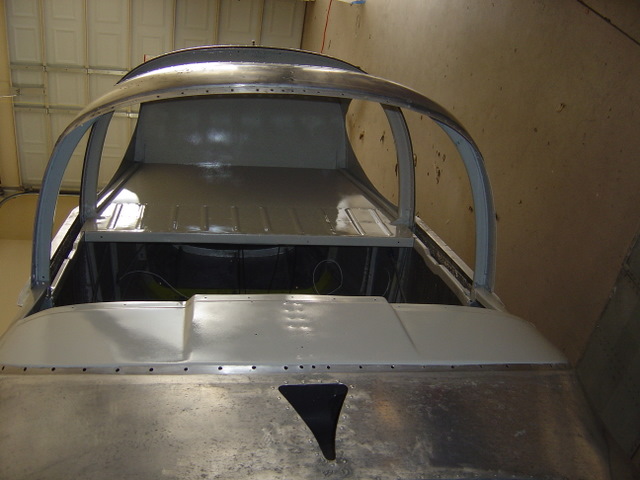
The rear access door had a heavy obsolete rotating beacon installed. We had to make a new panel and installed an inspection door for the sump drain with Dzus fasteners and all. We replaced all the wiring in the belly up to J-Box, replaced all the hydraulic lines in the fuselage, and installed a fresh air NACA vent in front of the windshield. This was all done with the airplane on its side. A custom built sawhorse was used as a temporary spar so we could get in and out of the fuselage while on the rotisserie. The sawhorse must be removed whenever the rotisserie is rotated and the fuselage is not upright.
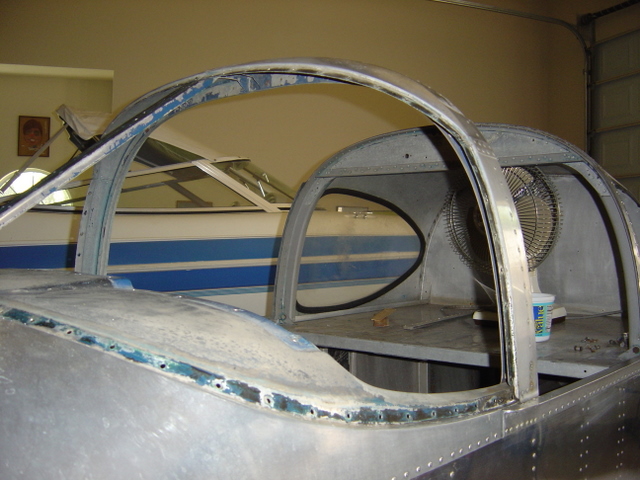
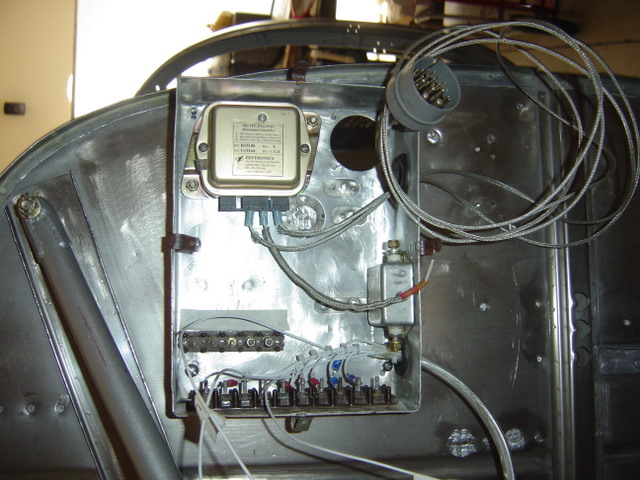
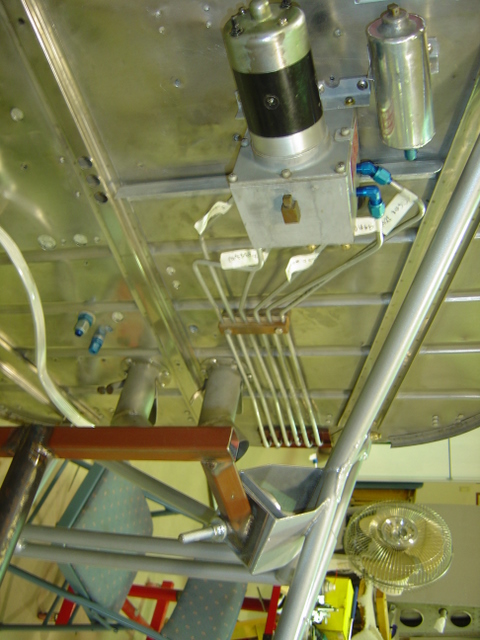

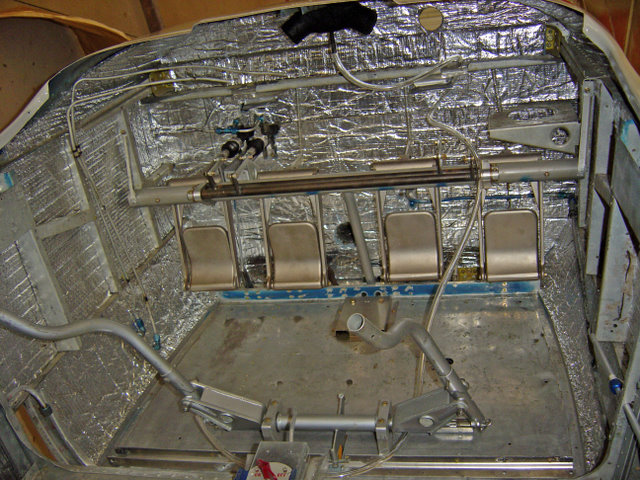
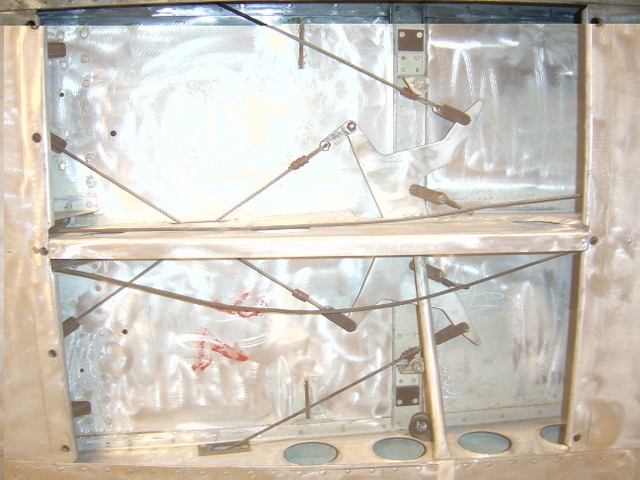
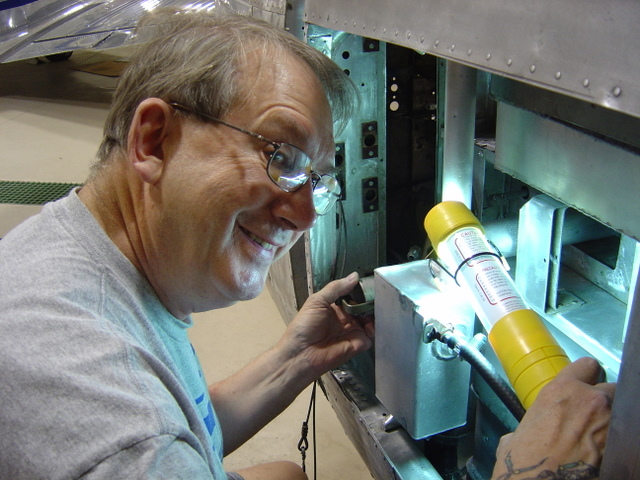
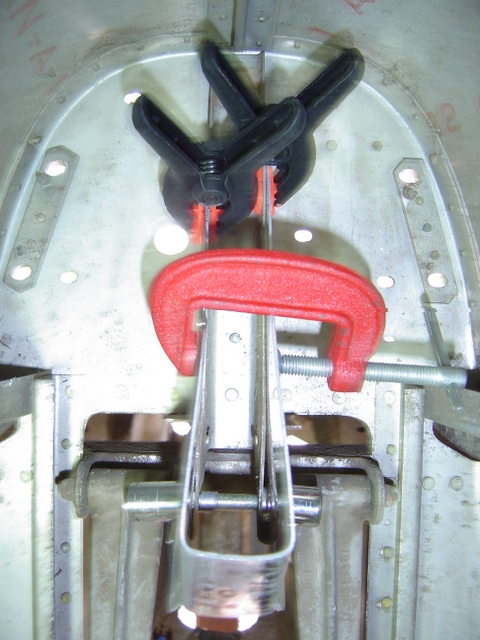
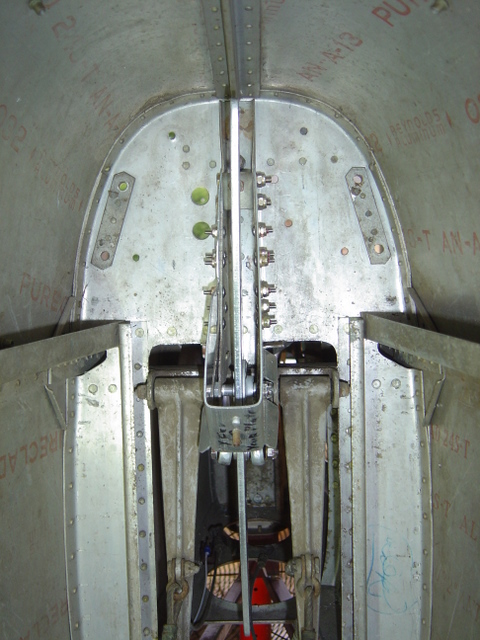
With the fuselage right side up and supported on the saw horse, we replaced the two forward side skins with one piece of 2024-T3 .040", removed all the glass, everything behind the firewall including the yokes and supporting structures, installed Chuck Lischer stick conversion (removed from Swift S/N 1144), relocated elevator stops, cleaned up or replaced as needed all pulleys (aileron pulleys and covers not yet installed), made all new elevator and rudder cables (aileron cables not yet complete), installed firewall blanket, insulation in cockpit and behind baggage shelf, installed fuel and vent lines for Corbin belly tanks, E-Nickel plated the emergency gear handle, flap & gear position handles, rudder pedals & hangers, installed pedals, added dual brakes, replaced the long rudder cable springs, mounted the power pack with Jim Montague's motor, brake master cylinders were re-sleeved by Sierra Specialty, installed static system, and replaced the placards.

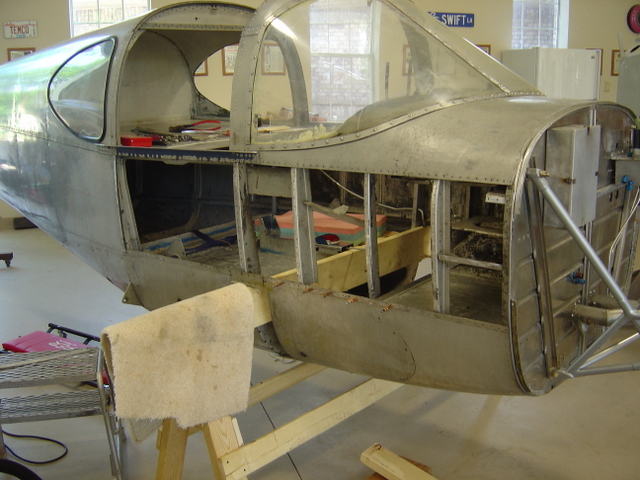
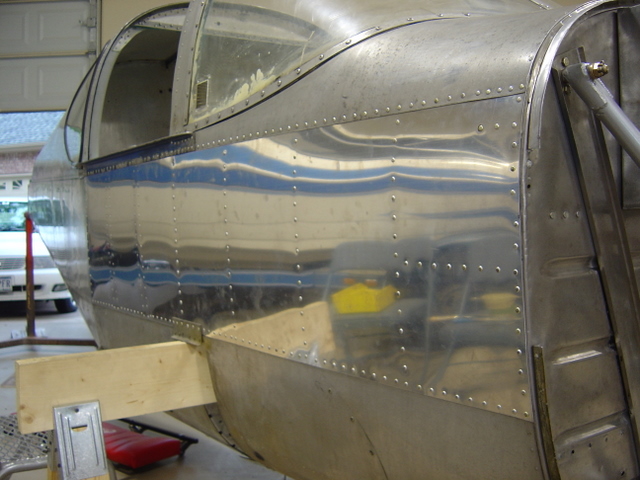
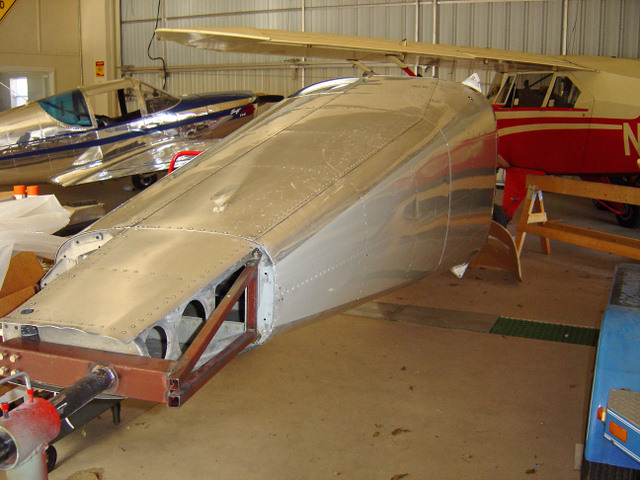
It got so hot in August, that Barb built a 10'x 25'x 8' room out of PVC pipe and clear plastic with a window air conditioner to work in relative comfort. This also became our paint booth. So, with the sawhorse removed and the rotisserie rotating again we removed the center window support in preparation for a one piece windshield, polished the fuselage to remove surface corrosion (lots of work yet to be done), and painted the underside of the fuselage, control surfaces, fairings, and inside of cockpit a dove gray (same color as under center section and wings done previously).
Every major alteration we made has an approved 337. The main sections are now ready to be assembled and set on the landing gear. Miscellaneous work is still continuing throughout the airplane. We replaced all the KSP3L bearings in the flight controls. We completed the instrument panel design and sent it out to make a CAD drawing, and water cut the panel. All the radios, instruments, lights, & switches have been acquired.